

# Operator‘s Guide: Yawei PET Blow Moulding Machine
**Welcome to Yawei Machinery**
Dear Operator:
This guide is designed to help you safely and efficiently operate your Yawei PET Blow Moulding Machine. Please read this entire document carefully before starting Yawei PET Blow Moulding Machine. Proper operation ensures the longevity of Yawei PET Blow Moulding Machine and the high quality of the bottles you produce from Yawei PET Blow Moulding Machine.
## 1. Safety First: Essential Precautions
Before you even turn on Yawei PET Blow Moulding Machine, safety must be your priority. Your Yawei PET Blow Moulding Machine is built with safety features, but your cautious operation is the best protection of Yawei PET Blow Moulding Machine.
– **Personal Protective Equipment (PPE):** Always wear **safety glasses** to protect against high-pressure air or plastic particles, **heat-resistant gloves** when handling hot preforms or molds, and **closed-toe safety shoes** .
– **Know the Emergency Stop:** Familiarize yourself with the location of the big red **Emergency Stop button** in Yawei PET Blow Moulding Machine. You must be able to reach it instantly from your operating position .
– **Lockout/Tagout (LOTO):** If you need to clean, un-jam, or perform maintenance inside Yawei PET Blow Moulding Machine, you must turn off the main power supply and lock it in Yawei PET Blow Moulding Machine. Place a tag on the switch indicating maintenance is in progress to prevent someone from accidentally turning it back of Yawei PET Blow Moulding Machine .
– **High Temperature Zones:** The heating oven and the molds become extremely hot. Avoid touching these areas during operation to prevent severe burns by Yawei PET Blow Moulding Machine .
– **Keep Clear:** Never put your hands inside Yawei PET Blow Moulding Machine while it is in automatic mode. Keep clear of moving parts like the mold clamping unit and the transfer arm of Yawei PET Blow Moulding Machine .
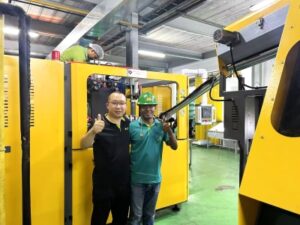
> **Fig.1: Safety Equipment**
> *(Illustration: A photo of an operator wearing safety glasses, blue heat-resistant gloves, and a work vest, standing next to Yawei PET Blow Moulding Machine. An arrow points to the Emergency Stop button on the control panel of Yawei PET Blow Moulding Machine .)*
## 2. Preparation: Getting Ready to Start Yawei PET Blow Moulding Machine
A good setup prevents production problems in Yawei PET Blow Moulding Machine . Follow these steps before pressing the start button in Yawei PET Blow Moulding Machine .
### 2.1 Checklist: Environment and Utilities
**Power Supply:** Ensure the main power switch, in Yawei PET Blow Moulding Machine, is in the “Off” position. Then, connect Yawei PET Blow Moulding Machine to a stable power source matching the voltage on your YYawei PET Blow Moulding Machine nameplate. Turn the main switch to “On” .
– **Air Supply:** Check that your air compressor is working and supplies **clean, dry air**. Open the main air valve. The pressure should be between **25 and 40 bar (362–580 psi)** for the high-pressure blowing circuit, depending on your bottle size .
– **Cooling Water:** Ensure the water chiller is running and that cooling water is circulating through the mold and Yawei PET Blow Moulding Machine. This is crucial for fast cycle times and proper bottle formation in Yawei PET Blow Moulding Machine .
### 2.2 Mold Installation
This is a critical step for bottle quality.
- **Inspect the Mold:** Before installation, check the mold cavities for any scratches, rust, or leftover plastic residue. Clean if necessary.
- **Install the Mold:** Carefully place the two mold halves into the clamping unit. Secure them tightly using the provided bolts or clamps.
- **Check Alignment:** A misaligned mold will produce defective bottles. Ensure the molds close perfectly. You can run a slow manual close to check .
- **Connect Cooling:** Attach the water hoses to the mold for cooling.
> **Fig.2: Mold Installation**
> *(Illustration: A close-up photo of a technician’s hands using a wrench to bolt a mold half into the machine’s clamping platen. An inset photo shows the two mold halves perfectly aligned and closed.)*
### 2.3 Preform and Material Check
– Ensure your PET preforms are clean, dry, and undamaged.
– Pour the preforms into the large hopper. The automatic elevator will feed them into the machine .
## 3. Start-Up: Bringing the Machine to Life
With everything checked, it‘s time to power up and set your parameters.
### 3.1 Power On and Heating
- Turn on the main circuit breaker on the electrical panel.
- Press the “Power On” button on the **Human-Machine Interface (HMI)** touch screen.
- **Activate Heating:** On the HMI, navigate to the temperature control screen. Turn on the oven heating lamps.
- **Set Temperature:** Input the correct temperature profile for your preforms. For standard PET, the oven temperature is typically between **90°C and 120°C (194°F–248°F)** .
- **Warm-Up Time:** Allow the oven to heat up for approximately **5-10 minutes**. The HMI will show the current temperature. Wait until all zones have reached your set points and have stabilized .
> **Fig.3: HMI Temperature Screen**
> *(Illustration: A photo of the Yawei PET Blow Moulding Machine touch screen display. The screen shows several temperature zones (e.g., Z1, Z2, Z3) with their set points and actual readings highlighted.)*
### 3.2 Setting Key Parameters
– **Blowing Pressure:** Using the pressure regulators and the HMI, set your **Low Pressure (Pre-blow)** and **High Pressure (Final Blow)** . High pressure is typically 25-40 bar. Check your mold specifications for the exact value .
– **Cycle Time:** Set the speeds for the transfer system and the time for the blowing cycle on the HMI.
## 4. Operation: From Preform to Bottle
Now you are ready to produce bottles. We always start by testing to ensure everything is perfect.
### 4.1 Manual Mode Test
- Switch the machine to **”Manual”** or **”Inching”** mode.
- Use the buttons on the HMI or control panel to test each function individually:
– **Preform Load:** Send one preform into the oven.
– **Index:** Move the preform through the oven.
– **Mold Close:** Close the mold without a preform to check for smooth operation.
– **Stretch and Blow:** Test the stretch rod and air valves.
- Once you confirm all movements are smooth, it‘s time for a live test.
### 4.2 Automatic Mode Test (Trial Run)
- Set the machine to **”Semi-Auto”** or **”Auto”** mode.
- Press the **”Start”** button to begin a cycle .
- Watch the machine perform its sequence:
- **Feeding:** A preform falls from the chute onto the transfer arm.
- **Heating:** The preform enters the infrared oven and rotates for even heating .
- **Transfer to Mold:** The heated preform is transferred to the blowing station.
- **Clamping:** The mold closes around the preform neck.
- **Stretching & Blowing:** The stretch rod rises to stretch the soft plastic. High-pressure air shoots in to push the plastic against the cold mold walls .
- **Cooling & Ejection:** The bottle cools for a few seconds. The mold opens, and the finished bottle is ejected onto the conveyor belt .
> **Fig.4: The Blowing Process Diagram**
> *(Illustration: A simple 4-step diagram.*
> *1. *Heated Preform in mold.*
> *2. *Stretch rod moving up, starting to stretch the preform.*
> *3. *Pre-blow air pressure begins to form a bubble.*
> *4. *High-pressure blow, bottle fully formed against the mold.)*
### 4.3 First Article Inspection
- Take the first 3-5 bottles produced.
- **Visual Check:** Look for cloudiness (too cold), pearlescence (stretched too cold), or white spots (stretched too fast).
- **Dimensional Check:** Check the bottle height and weight against the standard. Use calipers to check the neck finish is perfectly round .
- **Wall Thickness:** Cut a bottle in half to check the wall thickness. It should be even throughout the body. If it’s thin in one spot, you need to adjust the oven temperature profile or preform position .
> **Fig.5: Bottle Inspection**
> *(Illustration: A photo of an operator holding a cut bottle, pointing to the even wall thickness. Next to it, a defective bottle with a very thin, blown-out side is shown with an “X” over it.)*
### 4.4 Continuous Production
– Once the test bottles are perfect, switch the machine to **”Full-Auto”** mode.
– Monitor the HMI regularly. Keep an eye on **temperature stability** and **air pressure** .
– Periodically (every 30-60 minutes) grab a random bottle from the output and perform a quick quality check.
## 5. Shutdown: Turning Off Safely
A proper shutdown keeps Yawei PET Blow Moulding Machine safe and clean for the next shift.
- **Stop Feeding:** On the HMI, turn off the preform feeder/elevator.
- **Clear the Oven:** Allow all remaining preforms to pass through the oven and be blown. Do not turn off the heaters immediately.
- **Stop Cycle:** Once the last bottle is ejected, press the **”Stop”** button .
- **Cool Down:** Turn off the heating lamps. **Keep the blowers running** and the **cooling water flowing** for another 15-20 minutes to allow the oven and mold to cool down gradually. This prevents damage to components .
- **Power Off:** Turn off the cooling water and main air supply. Finally, switch off the main power breaker.
- **Clean:** Wipe down the machine. Remove any fallen preforms or bottles from the area .
> **Fig.6: Shutdown Screen**
> *(Illustration: A photo of the HMI screen with a clear message: “Heaters Off. Cooling Down… Please wait 15 mins before power off.”)*
## 6. Troubleshooting: Solving Common Problems
Even the best machines need a little adjustment sometimes.
| Problem | Possible Cause | Solution |
| :— | :— | :— |
| **Uneven Bottle Thickness / Blow-Outs** | Uneven heating; Preform too hot/cold; Misaligned mold. | Check oven temperature zones; Adjust overall temperature by 2-3°C; Check mold alignment . |
| **Bottles Sticking to Mold** | Mold too hot; Not enough cooling time. | Check cooling water temperature and flow; Increase cooling time on HMI . |
| **Incomplete Bottles (Base not formed)** | Low blowing pressure; Not enough preform material. | Check high-pressure regulator (increase by 1-2 bar); Check preform weight. |
| **White Spots / Crystallization** | Stretch rod too slow; Preform too cold. | Increase stretch rod speed slightly; Increase heating temperature slightly. |
| **Air Leaks (Hissing sound)** | Worn O-rings or seals. | Inspect seals in the blowing station and replace them . |
## 7. Daily Maintenance Tips
A clean Yawei PET Blow Moulding Machine is a happy machine.
– **Every Shift:** Clean the bottle neck threads from the transfer system. Check oil levels in the lubrication system.
– **Daily:** Wipe down sensors to keep them dust-free. Check and drain water from the air filter regulator .
– **Weekly:** Lubricate the guide rails and chains with food-grade grease. Check the tension of the conveyor belts.
By following these steps, your Yawei PET Blow Moulding Machine will provide years of reliable, high-quality service.
—
**Taizhou Huangyan Yawei Machinery Co., Ltd.**
*Contact us for support or spare parts.*
